High school biology slide decks must be designed with intention—to guide students through experiments while fostering scientific curiosity and critical thinking.
Beyond delivering facts, your slides should lead students to explore, question, and reflect on the scientific method.
Your slide structure should be built around six essential pillars: goal, hypothesis, equipment, methodology, predicted findings, and summary.
Begin with a simple, clear title slide that states the name of the experiment and the learning goal.
Keep the layout clean and uncluttered.
Use large, readable fonts and high contrast colors so that all students can read from a distance.
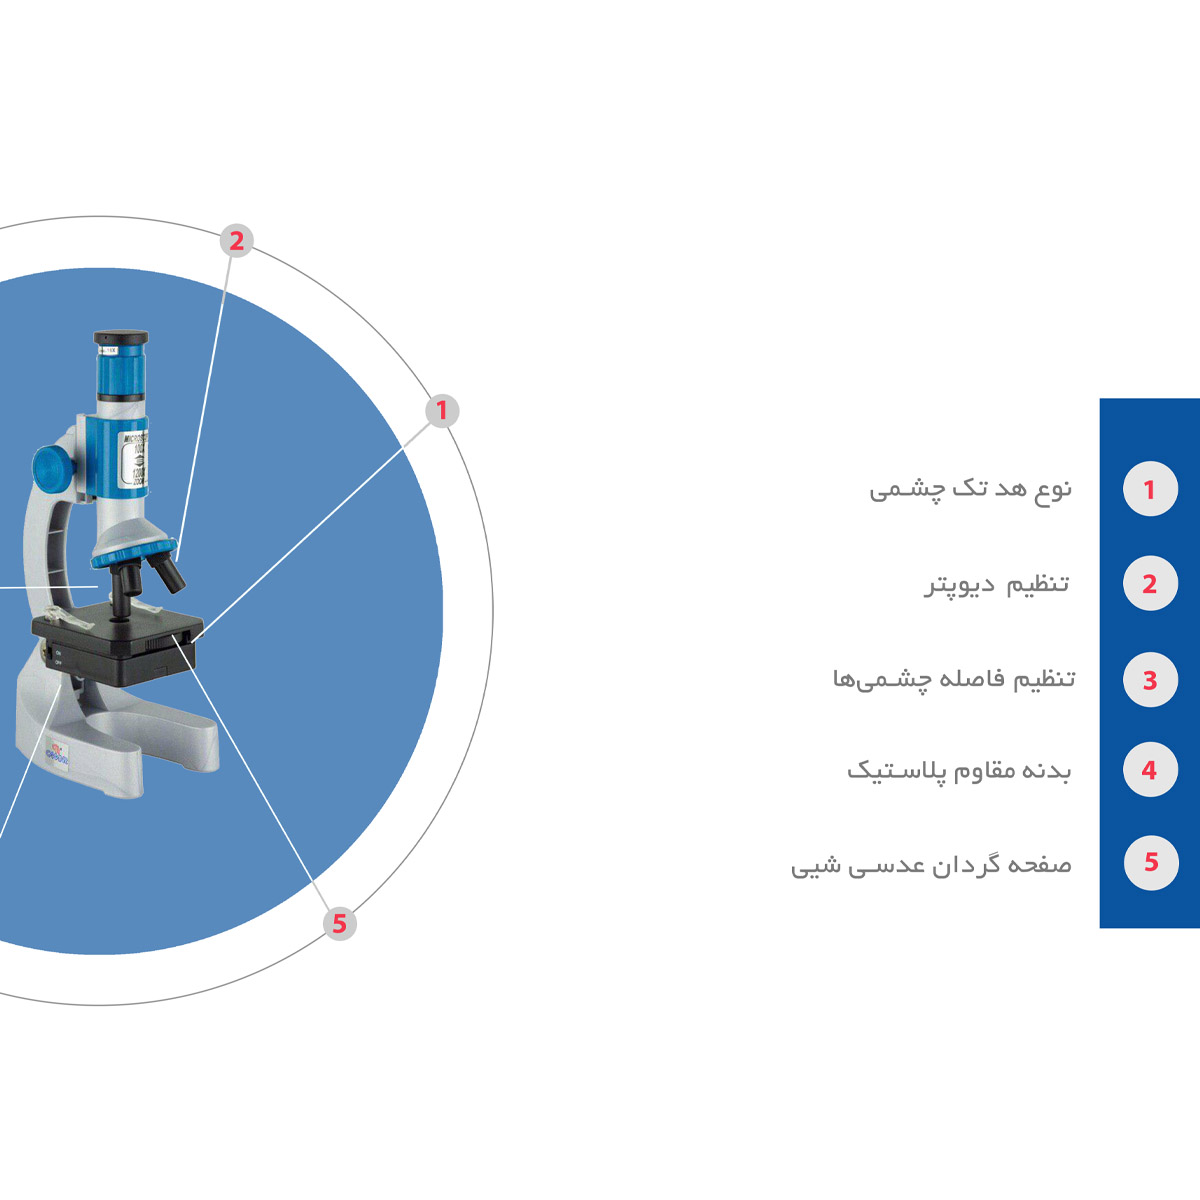
Include a relevant image, such as a labeled diagram of the organism or equipment being used, to provide visual context immediately.
This visual foundation makes complex ideas feel more accessible from the start.
Frame the core question that the experiment is designed to investigate.
Questions like "Why does this happen?" invite participation more effectively than statements like "This happens because…"
Ask questions that require observation and analysis, not just recall.
When framed as questions, experiments become investigations students want to solve.
Briefly link the current lab to earlier lessons—like how photosynthesis relates to respiration or how root structure supports water uptake.
On the next slide, list the materials needed for the experiment in a clear, bullet-point format.
Use minimal words and maximum clarity.
Pair each item with a simple icon—like a drop for pipette, a magnifier for microscope—to aid visual recognition.
Safety instructions must be visible and specific—not generic.
Safety should never be an afterthought—it must be integrated into the presentation.
Break down the lab steps into clear, sequential, numbered instructions.
Don’t say "look closely"—say "focus the microscope at 40x and sketch three cell structures."
Give specific instructions: "Add two drops of iodine solution and wait 60 seconds before viewing."
A short video or image series is worth a thousand words when teaching fine motor skills.
Visuals turn abstract instructions into tangible, repeatable actions.
Help students recognize what success and error look like side-by-side.
Contrasting images teach critical observation skills.
This helps students recognize patterns and distinguish between successes and errors.
Embrace variability as part of the learning process, not a flaw.
Add a dedicated slide for guiding reflection questions.
Pose guiding questions such as "What trends do you notice in your data?" or "How does your result compare to the class average?"
It moves them from observers to analysts.
Provide a blank or partially filled template they can reproduce.
Revisit the problem you started with—this creates narrative closure.
Invite reflection with prompts like: "What variables were hard to control?" or "What would you change if you did this again?"
This transforms the presentation from a lecture into a collaborative learning experience.
End with a slide that connects the experiment to real-world applications.
Link DNA extraction to forensic science or paternity testing.
This relevance helps students see biology as more than a classroom activity—it is fundamental to understanding the world around them.
Use a unified color palette, font family, and layout throughout.
Use animations sparingly and only to reveal information step by step, not for decoration.
What looks clear on your laptop may be blurry on a low-res projector.
Test any embedded videos or hyperlinks ahead of time to avoid technical issues during the lesson.
Finally, provide a printed or digital handout that mirrors the slides with space for خرید میکروسکوپ دانش آموزی notes.
It allows for review, revision, and reflection after class.
The most effective slides are not those with the most information, but those that support clear thinking, safe practice, and meaningful discovery.